

I often hear from my students about how they are just not happy with the photos they create, and they tell me because they are seeking help to understand why.
In fact, this morning I was recording a video critique from one of my teacher-instructed courses, where the student said she was not happy with her assignment photos. What she did not realize was that the solution to her problem was very easy to solve and I coached her by providing some simple solutions.
It was a case of ‘You don’t know what you don’t know.’ But now she knows!
There could be many reasons your photographs may be missing the mark in your mind. And it matters not whether you are photographing for fun or profit, if your photo misses the mark then that creates dissatisfaction and that is ok as long as you strive for a solution because that is how you learn!
Since I have personally instructed over 5,000 photographers in the online classroom, I have seen every mistake imaginable. So, I have put together some of the most common mistakes I have seen and suggestions on how to deal with them.
1-Equipment: Know the Benefits and the Limits of Your Equipment.
Having an expensive camera does not guarantee…..anything! Expensive cameras still take bad pictures while a cheap camera could produce a Pulitzer Prize-winning photo. The point is to not get caught up in all the equipment and spend a fortune with the idea that all your photos will be amazing. Instead, choose any camera and focus on learning photography.
Use a tripod when it’s needed. There has been a general ‘guideline’ for a very long time and that is 1/Lens MM should be the longest shutter speed for that lens when hand-holding. This is only a guideline, but what it stands for is if you are using a 400mm lens AND handholding then your shutter speed should be at least 1/400th or faster. This has served me well for decades but with lenses now including Image Stabilization then this rule can be fudged some. And I mentioned ‘hand-holding’. The point is that a tripod helps greatly in preventing blur as well as allowing small apertures and slow shutter speeds.
As an example, if you want blurry water you need a long shutter speed and that will require a tripod to prevent camera movement.
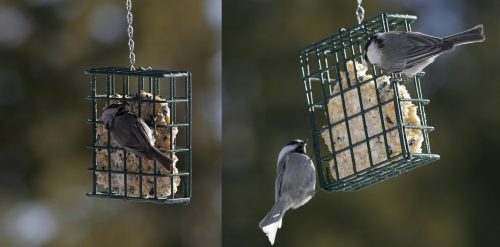
If you have a flash, know the limitations on how far it can send light. That flash will do well with a subject at 20’ but might not do so well at 75’. The image left does not show the light from the flash very well so I moved closer and opened my aperture from f/11 to f/5.6 and the subject is much brighter. It’s best to test the flash and see how far it can send light at different apertures.
2-Camera Settings: Avoid Choosing the Wrong ISO and Shutter Speed
Today’s digital cameras can work at high ISO’s which provides faster shutter speeds and that reduces the potential of blurry pictures. On the other hand, a low ISO can result in longer shutter speeds that create interesting motion effects. I always recommend using the lowest ISO unless you cannot take the photograph you want before increasing it. A perfect example is the night sky where you need a high ISO to get the stars to record.
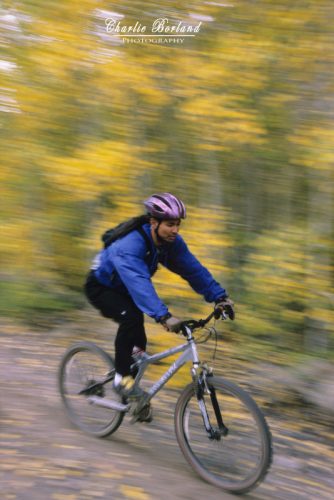
But, if you want to create a blur-motion effect with a bicyclist zipping by then that technique requires a longer shutter speed, like 1/8th and using a low ISO allows longer shutter speeds.
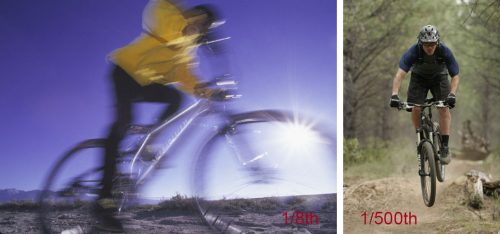
Always choose a shutter speed appropriate for the subject and the effect you want to create. If you need to stop a moving subject or insure it is tack sharp, use fast shutter speeds. If you want to show motion or movement, then choose a slow shutter speed. Here you can see that the blur effect on the left created motion blur using a longer shutter speed and low ISO of 100 while the stop-action on the right was created using ISO400 because the light level was low.

In real estate photography, light levels inside are usually low and this requires long shutter speeds for proper exposure and a tripod to keep the camera steady. Here, a higher ISO around 400-800 prevents the shutter speeds from getting too long when using f/11 and helps catch the light from the lighting fixtures.
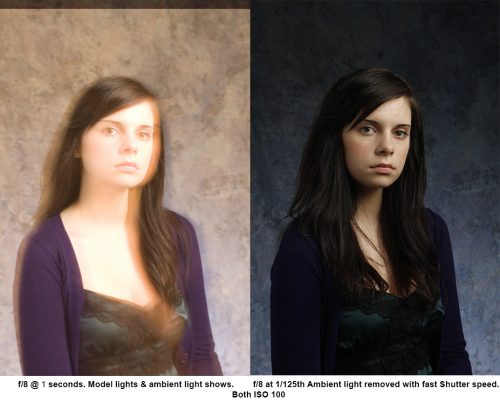
Choosing the wrong shooting mode can also result in the wrong shutter speed in the studio and cause problems like the left portrait. When lighting with strobe lights you often want the strobes to be the only light on your subject and you do that with your shutter speed. The left photo is in Aperture Priority Mode and it chose 1 second as the shutter speed because the studio was dark while the right image was Manual shooting mode where I set 1/125th and that shutter speed blocked the ambient light from being part of the exposure.
3-Composition: Not Paying Attention to the Strongest Part of the Photo
Most successful photos have something that catches our eye and it could be a center of interest that is dominant in the photo. Or it could be more nuanced and harder to highlight. But there is always a reason we want to take the picture in the first place and a successful composition does this by directing the viewer to a specific part of the photo.
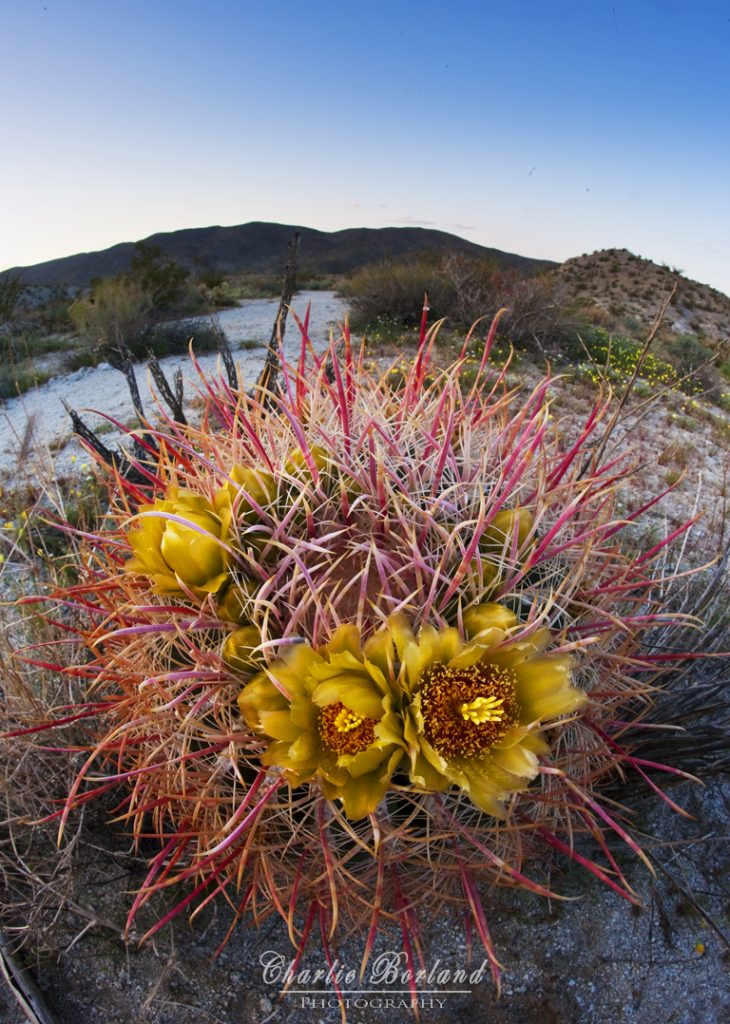
Here, it is obvious what the center of attention is. In fact, I found the flowers on the cactus the main subject so I used a 15mm fisheye lens at f/16 to emphasize them even more.
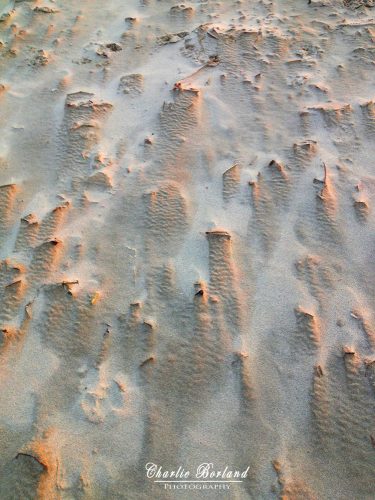
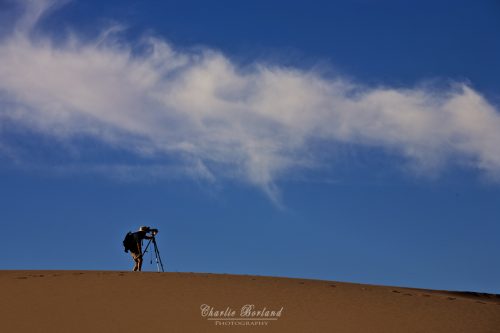
In this sand texture scene, the center of interest is less obvious and could be considered a less effective photo.
4-Light: Learn to See the Light!
Quality light is crucial to a great photograph, no matter whether it is an outdoor landscape or a product photograph captured in the studio. Lighting matters and is so important for you to become a lighting master.

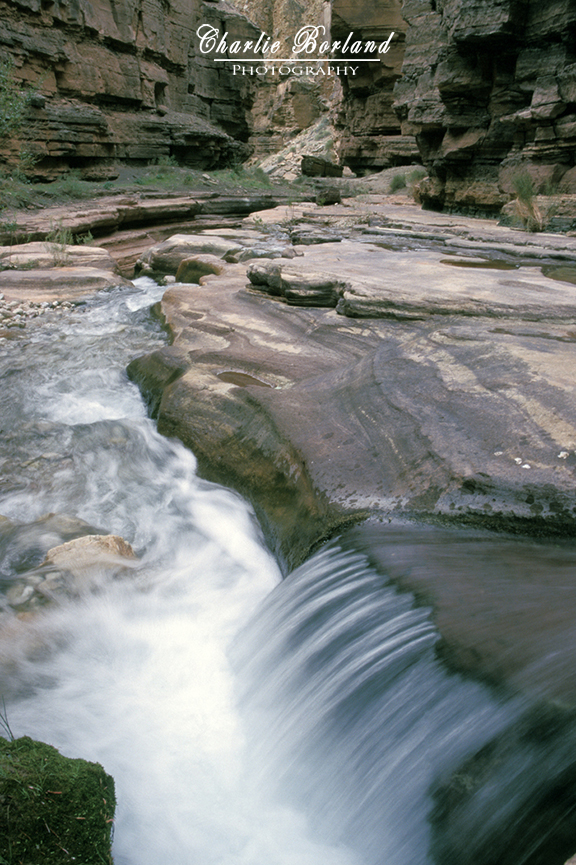
There is no doubt that this amazing sunrise lighting led this photo to be one of my most published images. This warm quality light creates a positive reaction to those who view this and similar images. Its why it is so important to Chase the Light in pursuit of the best light for the subject wherever it may be. It was captured on a 4×5 view camera with a 210mm lens (normal) and f/32 at 1 second.

While the same can be said when photographing products in the studio, here you create that quality of light with your strobe lights. Notice how the light emphasizes the shapes and contours of this shoe and it was all created using strobe lights, lightboxes, and on a fake tennis court surface.
5-Backgrounds: Watch your Backgrounds
In outdoor photography, whether nature, portraits, or products, backgrounds are so important. A bad background can ruin an otherwise great photo.
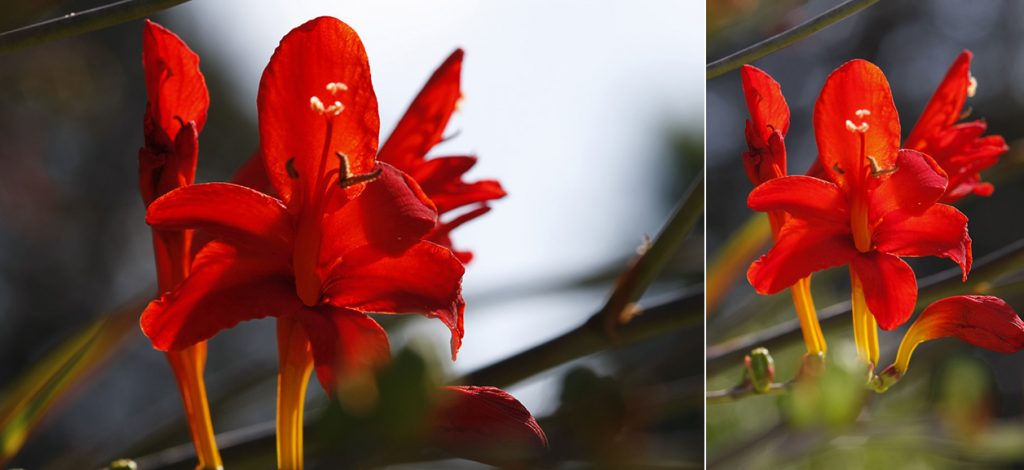
Consider this garden flower that was lit with flash. I moved a little left and a little right trying to find an angle I liked but moving right brought in the sky and that big white background ruined the photo IMO. The image right was created after moving left and going vertical removed the sky resulting in a stronger photo that is all about the flower.

Here is an industrial photoshoot I had, and we started with the left side photo. The model was measuring metal compounds, and this is one of the first photos I took. Upon review, that big piece of metal in the back was behind his head. So, I moved a little left and captured the middle photo. This looked better but that piece of metal in back still towered over him so in the right photo we moved him towards the background a little and then he measured that piece of metal with his device. This looked so much better since the piece of metal does appear to loom over him as much. This is an example of dealing with a background issue by making it part of the story.
As I mentioned, these are the most commons mistakes I see in my online student’s assignment submissions and I certainly hope, that if you are not completely satisfied with your photography that you found ideas here the will help you move forward with your photography.
Of course, if you have questions, just message us.
And if you are looking to advance your photography further all our photography courses are very in-depth and teach the same concepts I mentioned here. And each course is available for 50% off since you read this post. Use Coupon C0de SAVE50
How to Be a Professional Outdoor and Nature Photographer
Mastering Architecture and Real Estate Photography (BESTSELLER)
Wireless Flash Techniques for Outdoor and Nature Photographers
The Ultimate Guide to Landscape and Nature Photography (BEST SELLER)
Ultimate Guide to Digital SLR Photography
Beginners Guide to Studio Portraiture
How to Be a Commercial Photographer
Into the Eye of the Sun-Natural HDR
Getting the Most from Adobe Camera Raw
I hope you enjoy your new course and message me if you have any questions.